Creating A Project To Be Labelled
This guide will walk you through setting up a new project in Aival Analysis Lab, from creating the project to adding users who will do the labelling work.
Creating Your First Project
Let's start by creating a project. Here's what you need to do:
- Log in with your Administrator account
- Go to the 'Projects' tab
- Click the 'Create Project' button
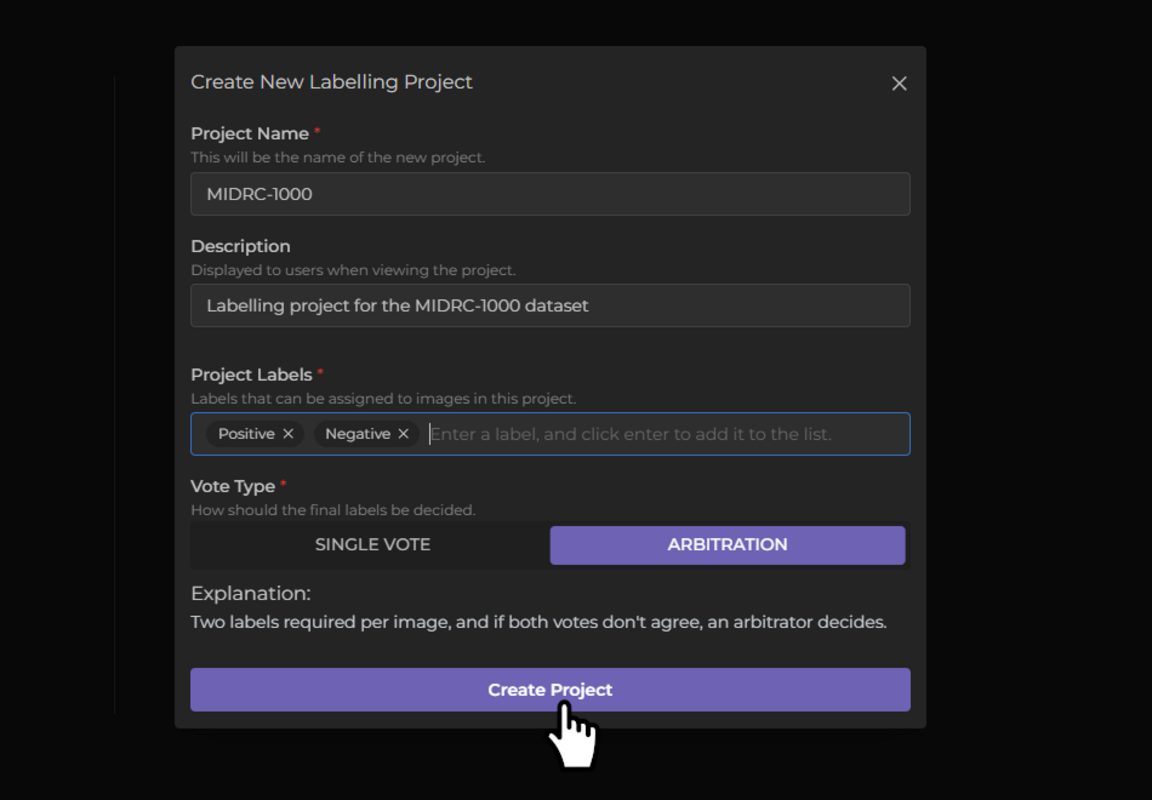
- Fill in the project details in the popup:
- Give your project a name
- Add a description
- Choose your vote type
- Set up your labels
Once created, your project will appear on the Projects page:

Don't worry about losing your work - your project will be saved even if you log out and back in.
Understanding Vote Types
When setting up your project, you'll need to choose between two voting systems:
Single Vote
- Requires just one labeller per study
Arbitration
- Requires at least 2 labellers per study
- If they disagree, a third person (the arbitrator) breaks the tie
Adding Images to Your Project
Every project needs at least one image set to work with. Here's how to add one:
- From your project page, click 'Allocate Image Sets'
- Click 'Add New Image Set'
- In the popup, you'll need to provide:
- A title for your image set
- A description (optional but helpful)
- The location of your images on your machine
Important: Your images must be in the right place for the system to find them. If you're using Docker, they need to be in the /data/ folder of your Docker volume. Check out our data requirements for more details.

Once processed, you can add this image set to your project. Your project overview will then show all the studies ready for labelling:

Next Steps: Adding Labellers
Your project is almost ready! The final step is to add users who will do the labelling work. You'll need to:
- Create user accounts for your labellers
- Assign them the correct roles and permissions
- Add them to your project
Head over to the User Roles and Management guide to learn how to set up your labelling team.